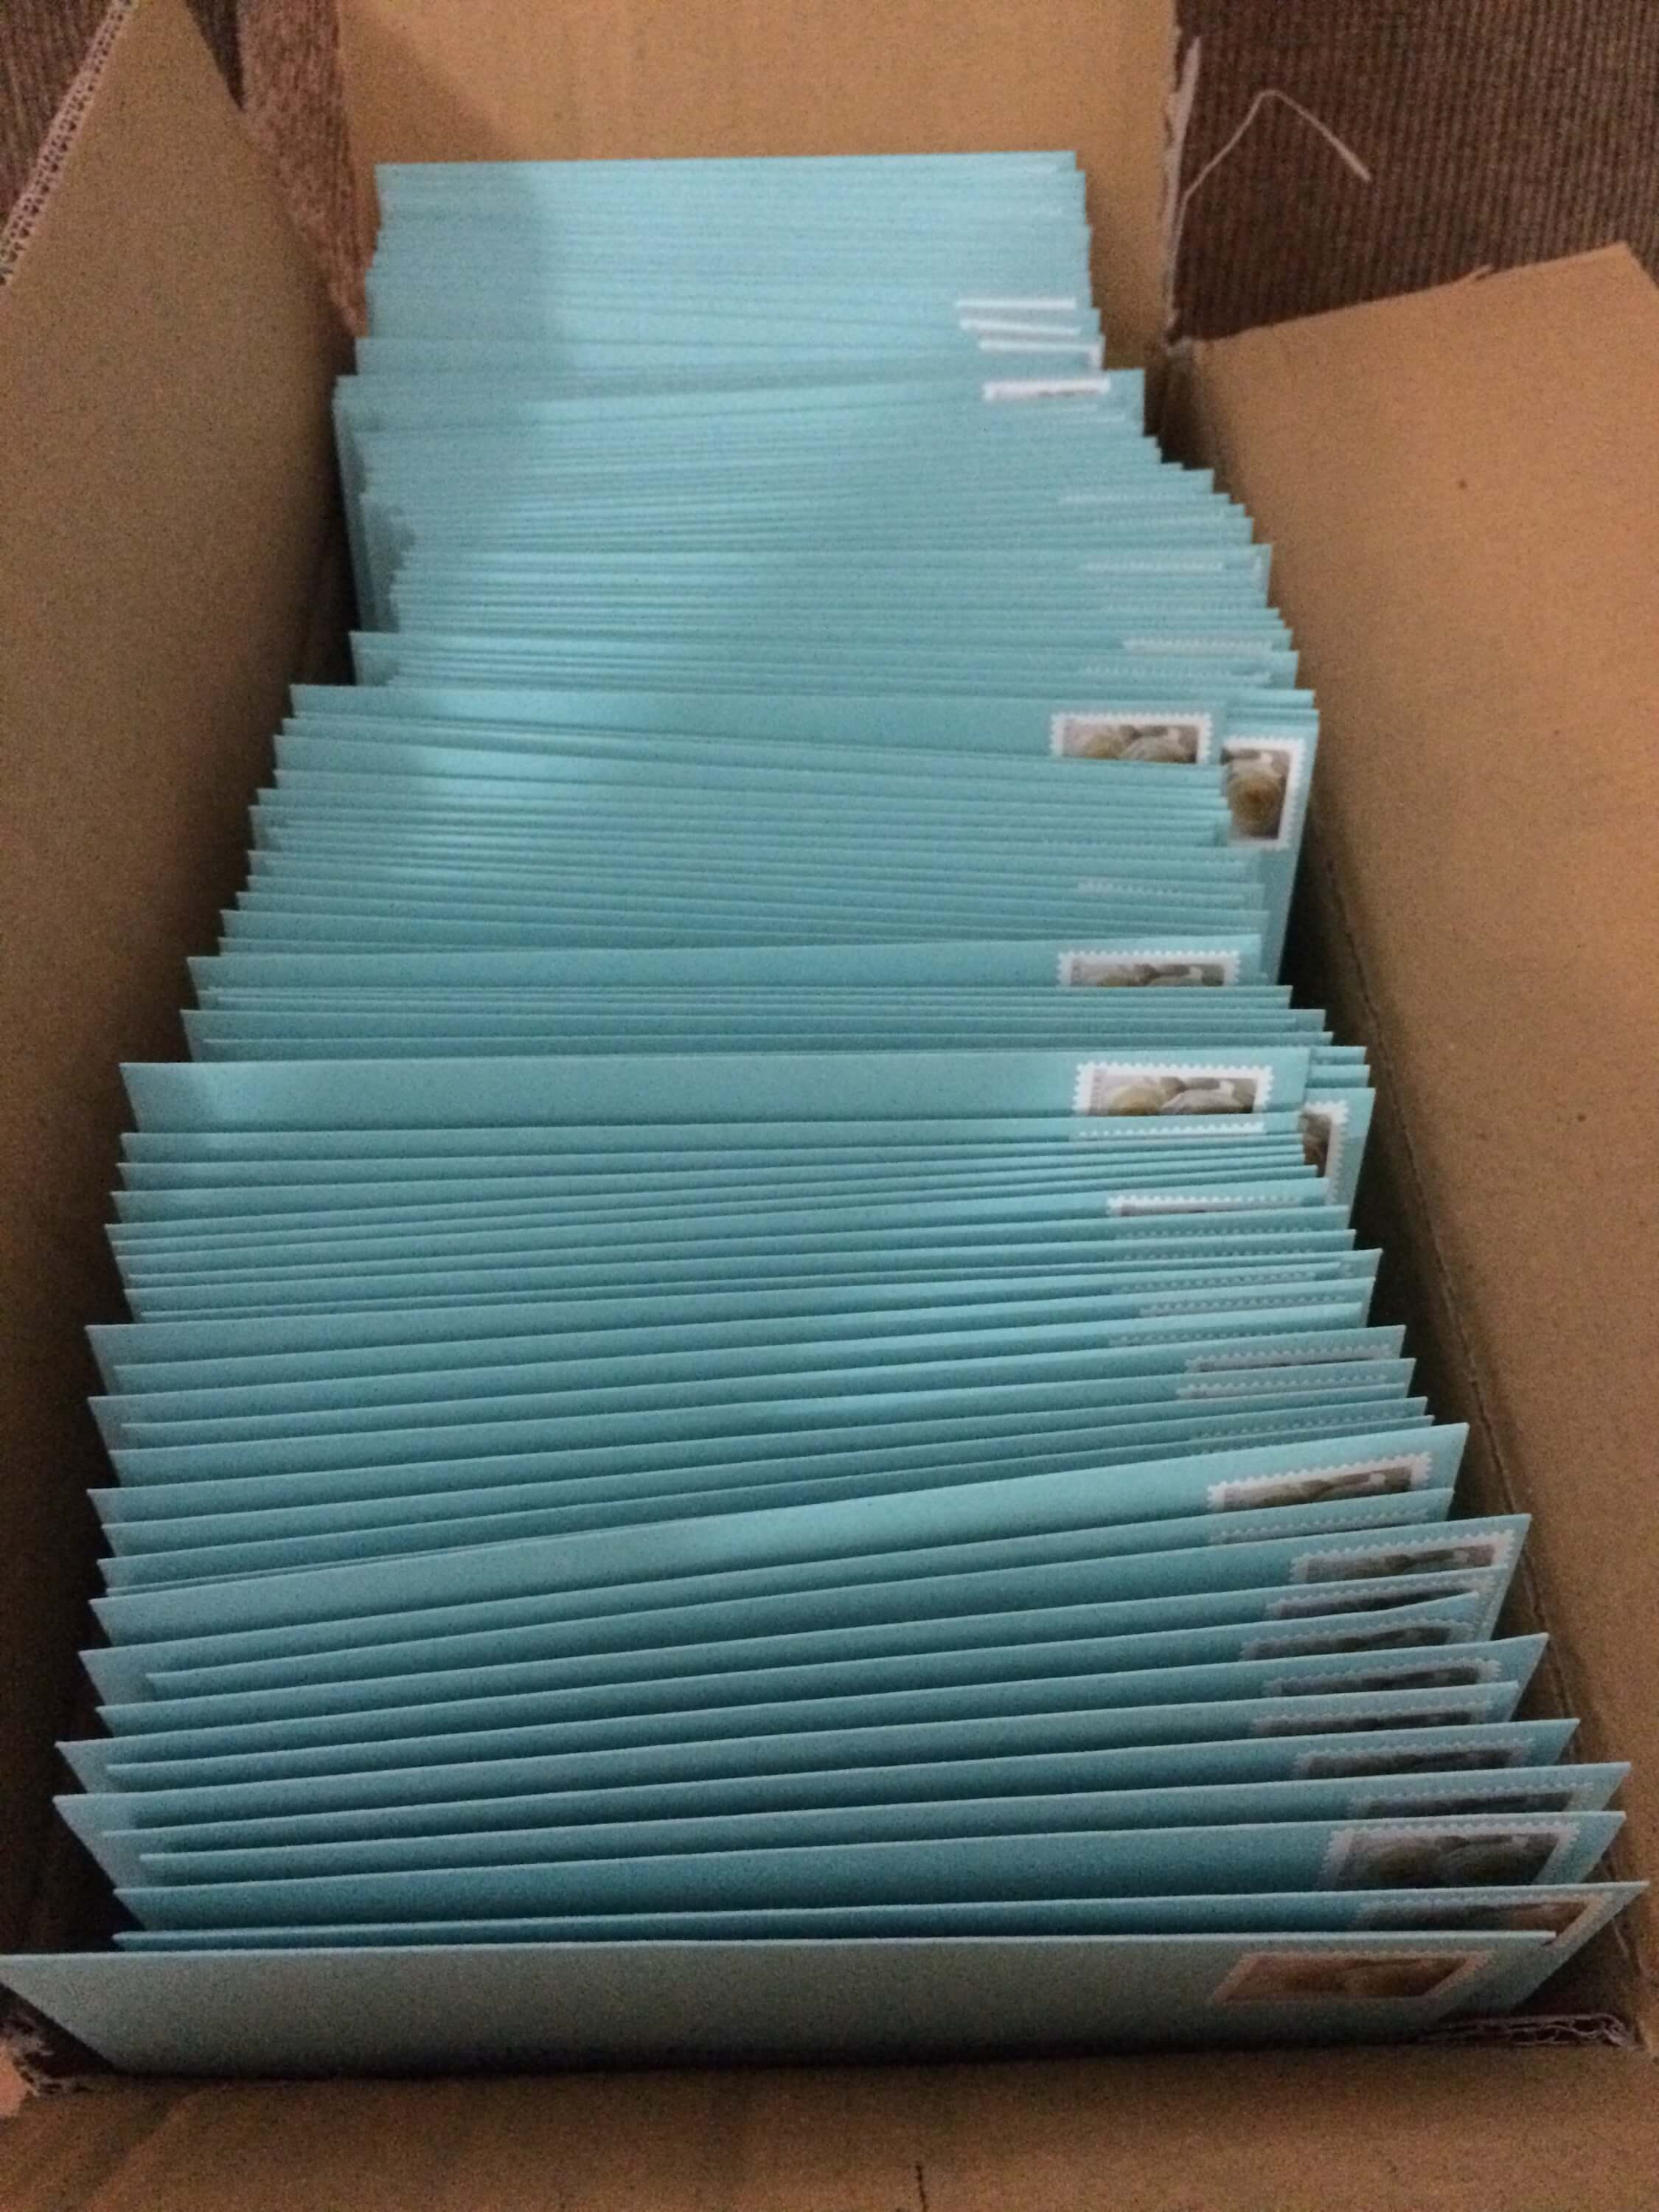
Last night, I dropped off 120 little blue envelopes in the mail, and I couldn’t feel more relieved. My wedding invitations are done!!
I took a DIY approach to my invitations. I had ordered save the dates for a reasonable price off of a website, so thought that I could find some cheaper invitations as well. LOL NOPE. The cheapest I could find was going to be well over $800. For just the invitations. For ink and paper.
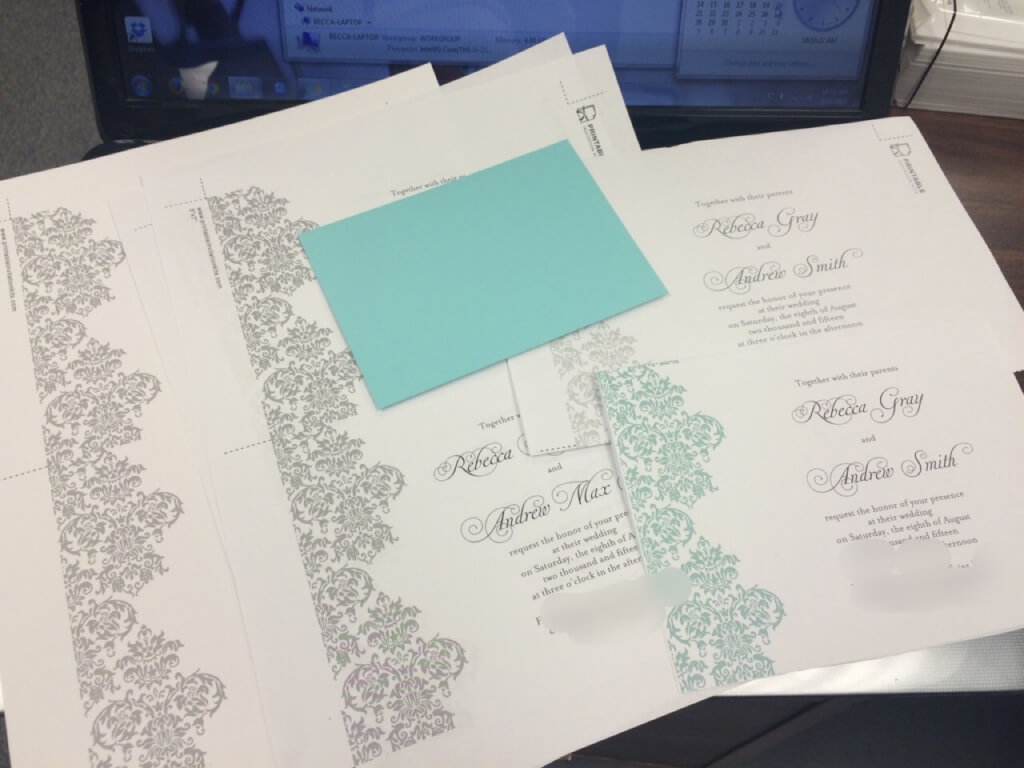
Being the broke frugal and creative college student that I am, I thought there has to be a cheaper way to do this. So I looked around on Pinterest and got some ideas and headed to work.
I found a free online template that I was able to download and customize. My church had a copier that I could use and only charge $0.10 a copy so my mother and I headed to Office Max to buy paper. We picked out a glossy white, thick paper (110 lb) for about $15. It came with 500 sheets. Back at church, we started to make copies. Two invitations fit on one sheet of paper, and we made extra, but we only used 75 sheets.
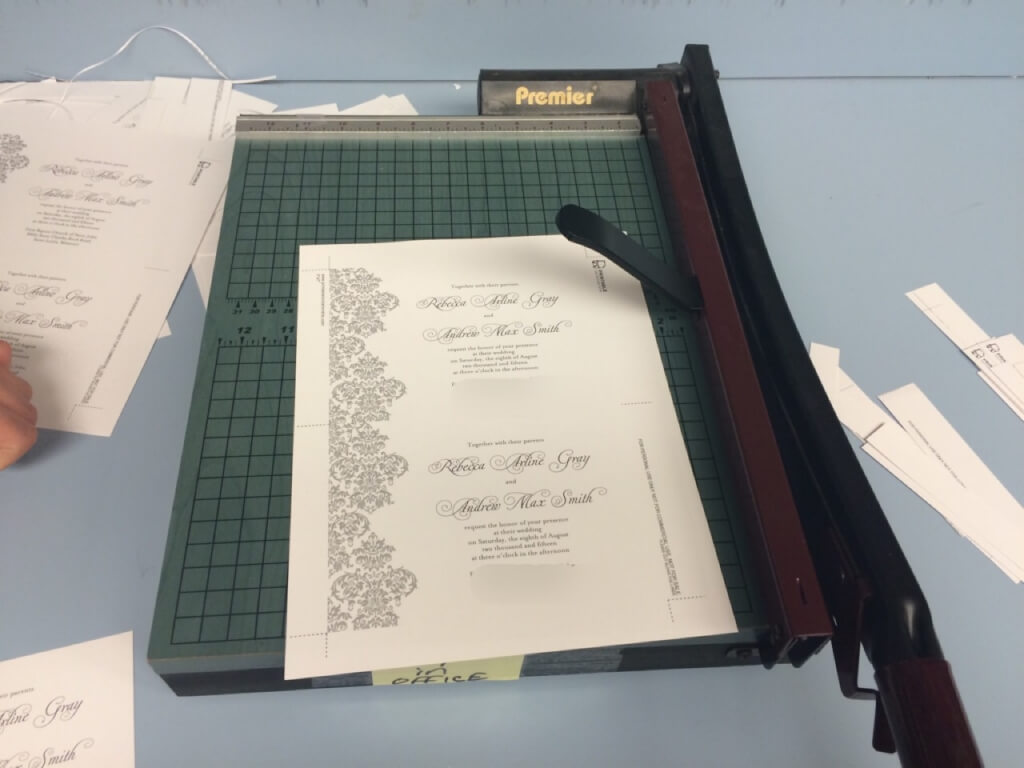
The hardest part of this whole process was this next step. When I found this template, I didn’t give any second thought as to how time consuming it would be to cut each invitation out. They have large paper cutters at church, and even with two other people helping me, it took over two hours just to do the invitations. It was so tedious and frustrating because you could only do one at a time, otherwise the edges would cut jagged and it just looked cheap and homemade.

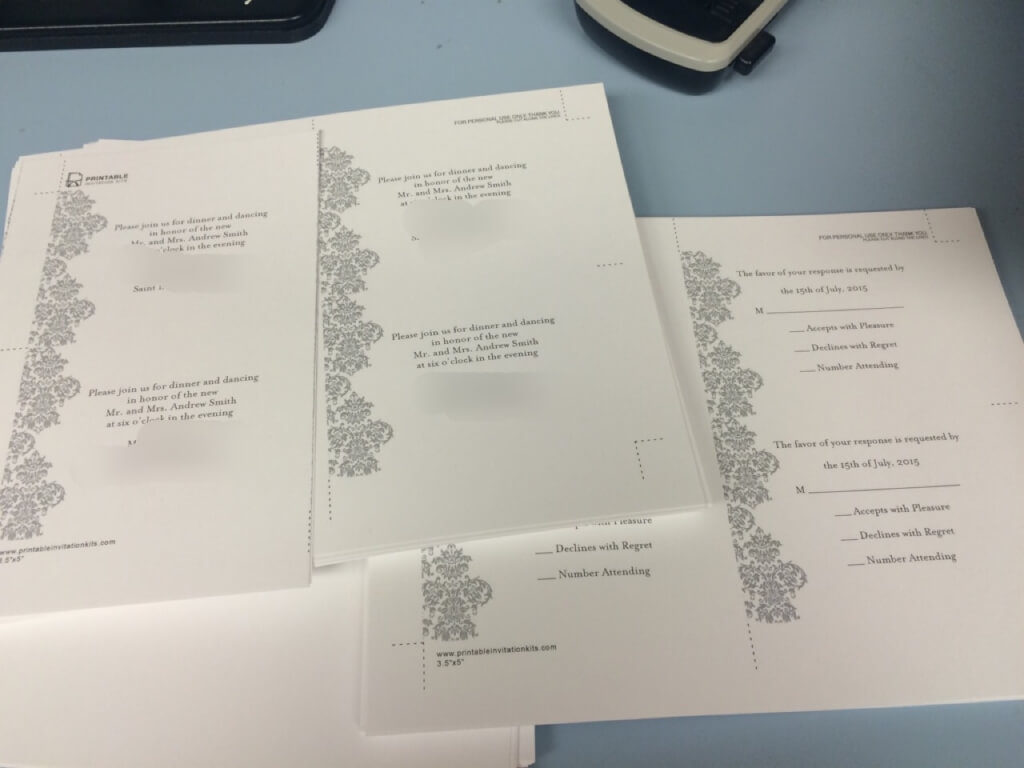
For the reception and RSVP cards, four fit onto one sheet, so we had to use even less paper for that, I think we used maybe 35 sheets for each. We saved the cutting for another day. 
Next I searched for envelopes in a color that would match my wedding colors. I first ordered a sample from envelopes.com and I loved the color! Since I had to order in quantities of 50, I ordered 150 A7 envelopes and 150 A1 envelopes for the RSVP cards. (Side note: I was so glad I ordered extra envelopes because we needed them! My mother, sister, maid of honor, and I went through so many extra envelopes when we made mistakes – and it is so easy to make mistakes when you’ve been addressing envelopes for three hours!)

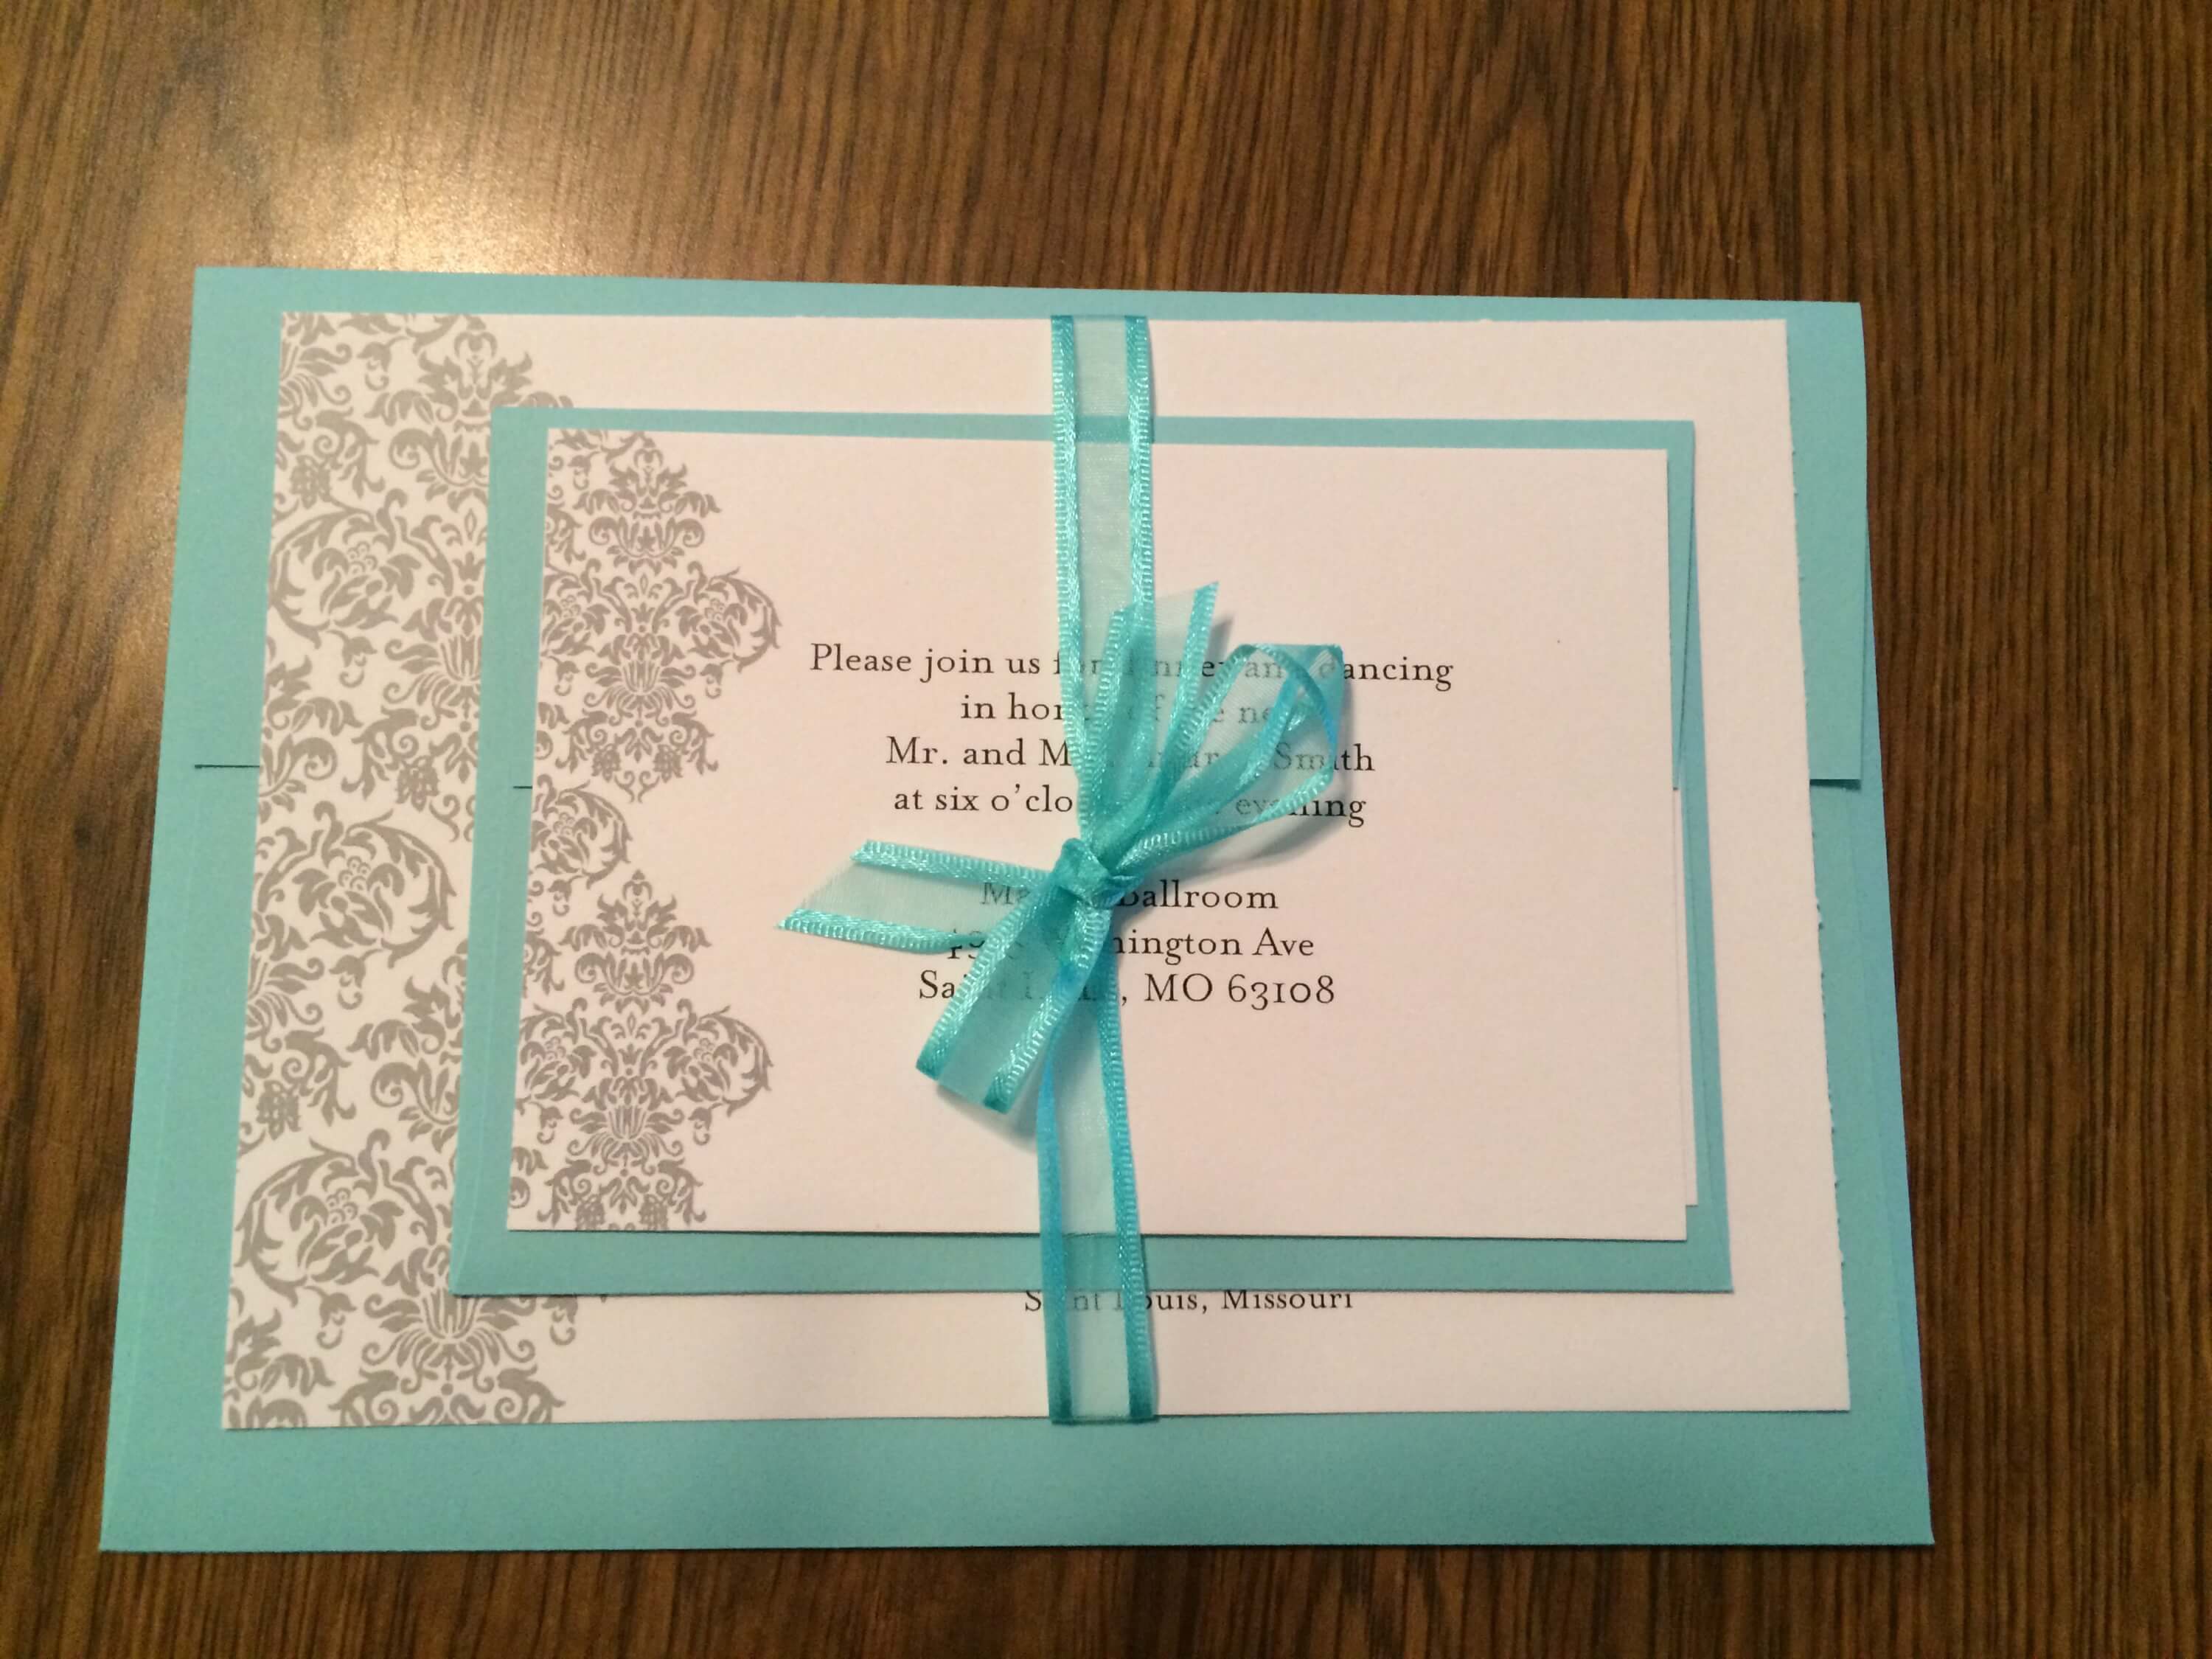
As I was playing with the invitations, I wanted them to be a little more unique and personal than just a piece of paper in an envelope. I played with the thought of using a doily somehow, but wrapping the invitations in it or I’ve even seen it done where the doily is glued to the inside of the envelope. However, I just couldn’t make it work to how I liked it. So I just used a simple ribbon and tied all the pieces of the invitation together with a bow. I love the idea of my guests having to untie the ribbon to get to the invitation – kind of like a present that I am giving to them. Ha – maybe I am dumb, but I like the idea.
I love, love, love how my invitations turned out. It was very time consuming and a little stressful at times – after tying about fifty bows in a row, I was wondering why again I was being so cheap and not paying someone else to do them for me! But I am very pleased with how they turned out and I feel like they are a bit more personal than anything I could have ordered online.
ALSO! When I went to the post office to weigh my invitation to see how much postage it would need, it was light enough that I could use just one regular stamp. I didn’t have to pay the extra $0.30 or however much it is per envelope because most invitations are so much heavier. That in itself saved me $35 at the post office!
All in all, this DIY project saved me at least $700. A price break down of how much I payed for each item and from where:
- Envelopes: $75, from envelopes.com
- Paper: $15, from Office Max
- Copies: $20, used church copier
- Ribbon: $50, from Michael’s
Grand Total: $160
Per Invitation: $1.33
I also have about half of my pack of paper left, which I will use to make my ceremony programs, (expect a blog post about that too, hehe). I also had about 5 extra rolls of ribbon, which will also help make the programs. So part of this cost will also be put into making my programs.
As much fun as making these invitations were, I’m glad that they are done!
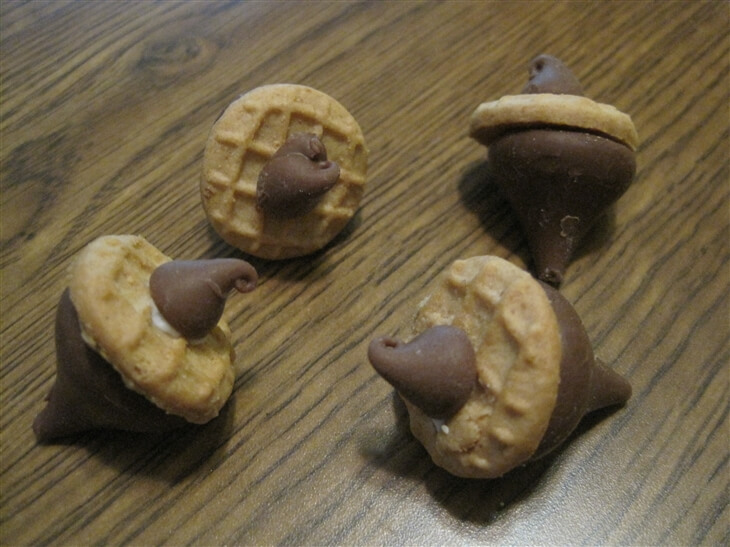
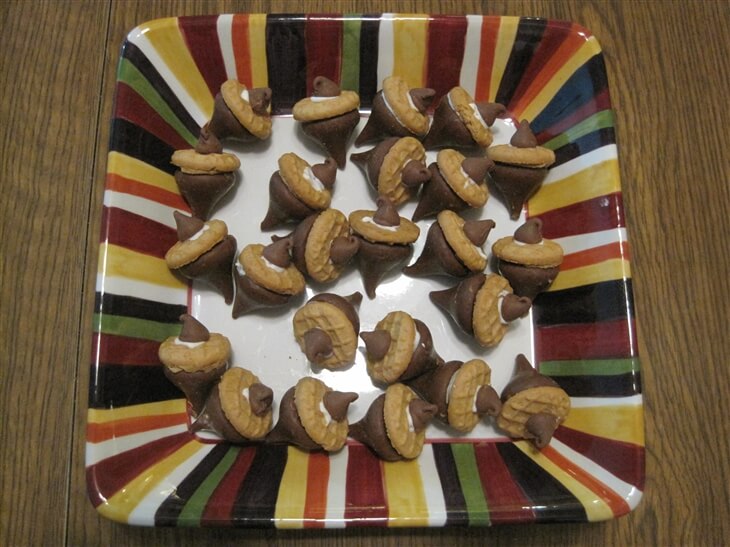
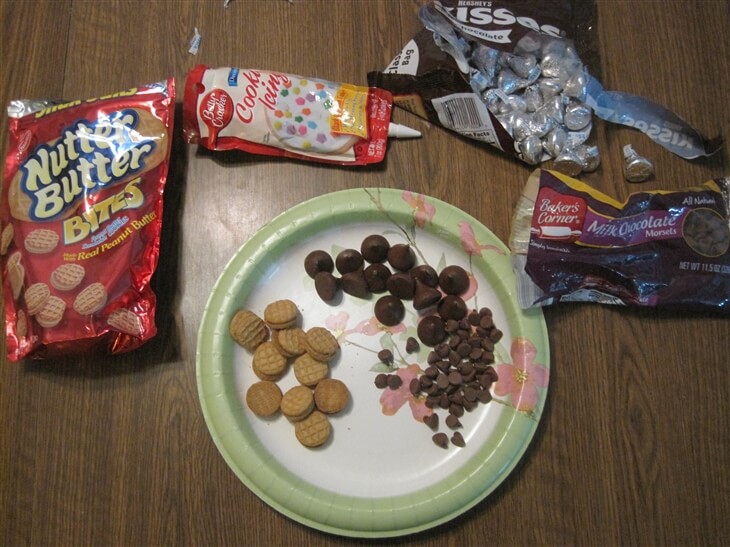
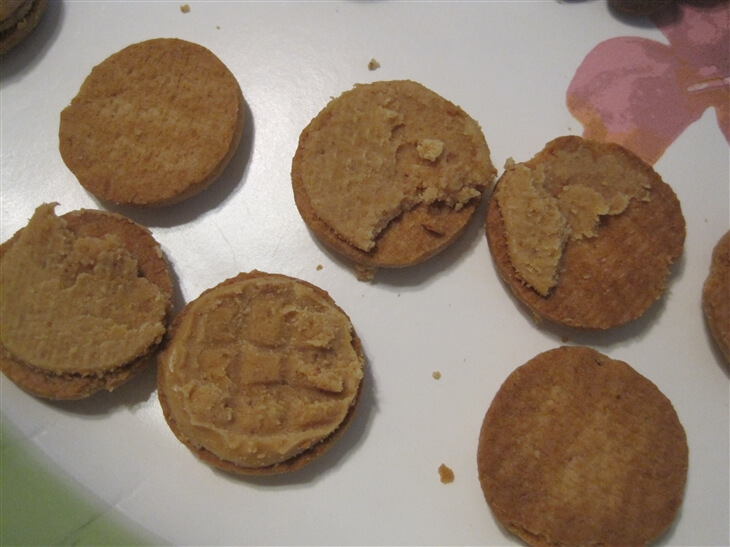
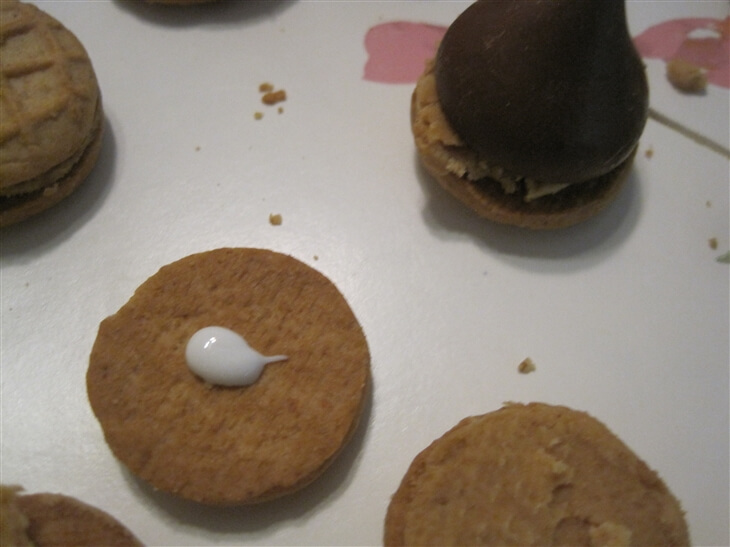
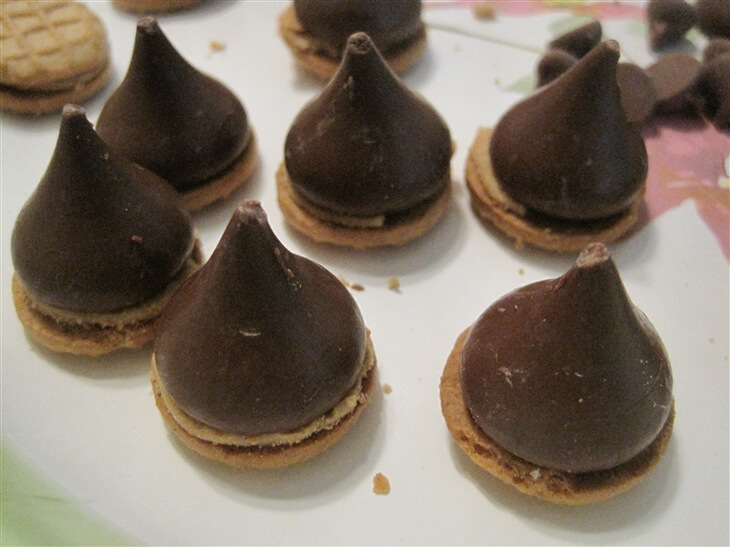
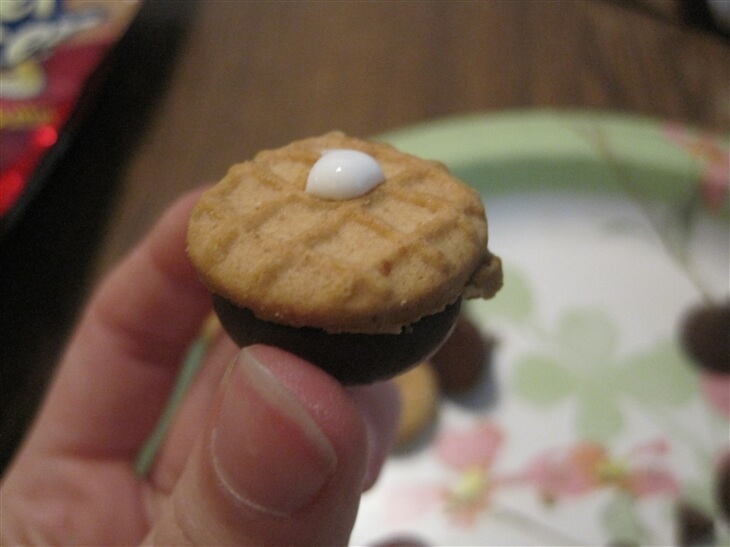
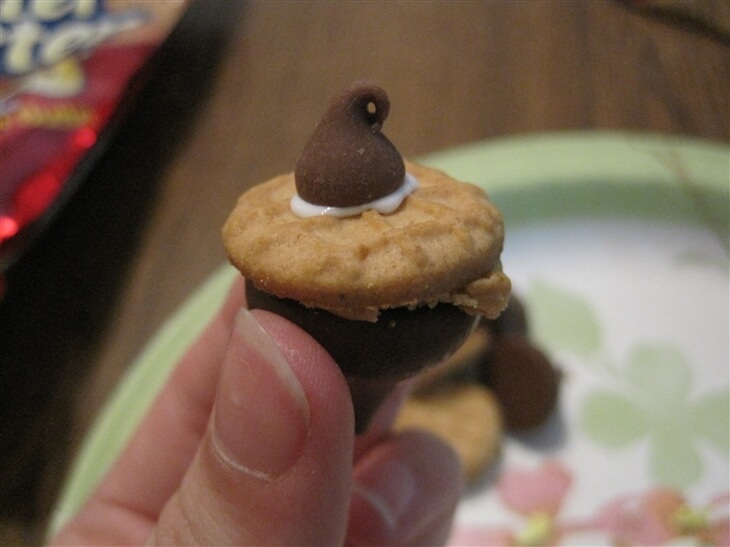
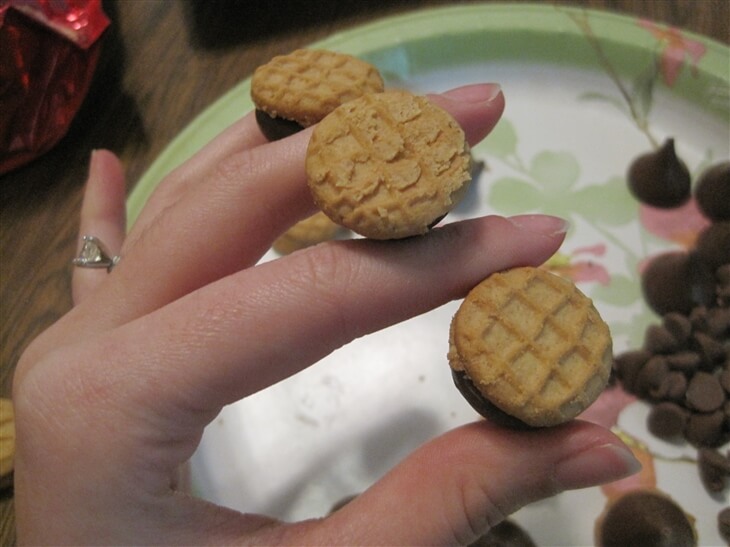
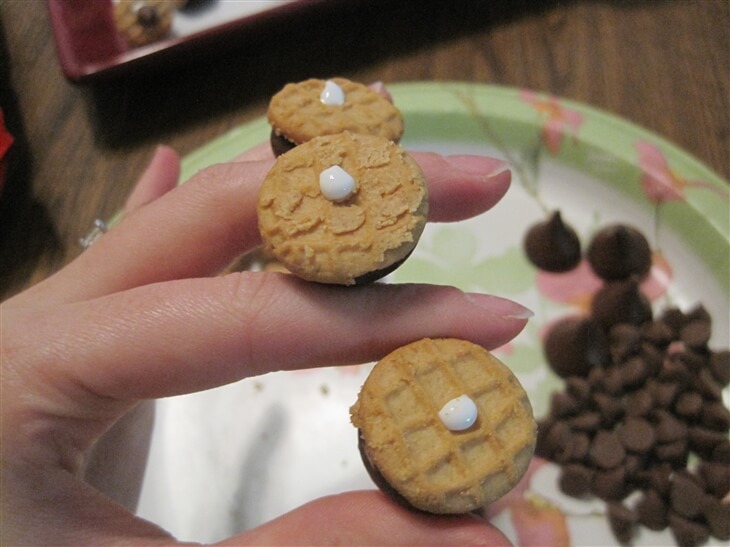
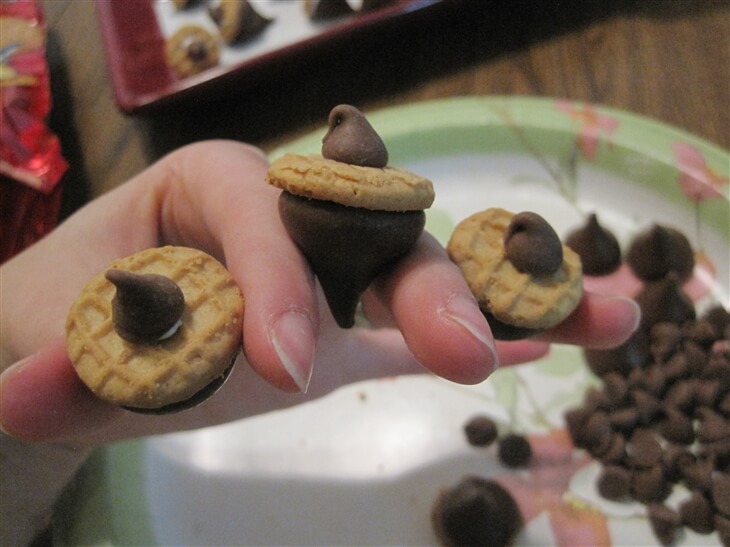
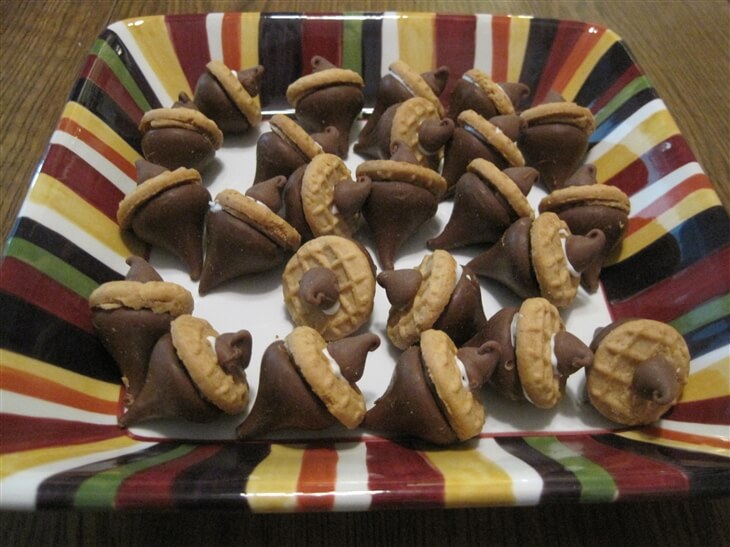
 My mom always hosts Thanksgiving for our family and there are always at least 25 people in our little house every year. This year, my mom found this cute snack that she’d been dying to have me make with her, which she had apparently already made earlier in the month but my family gobbled them up.